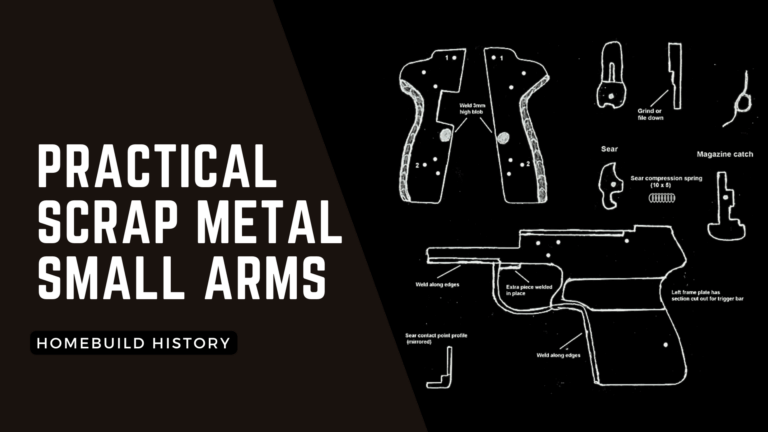
Welcome to Homebuild History, a new segment on 3D Gun Builder’s website where we focus on the history of some of the most iconic homebuilt firearms, their contributions to the world, and most importantly, how YOU AT HOME can get your hands on these classic arms and armaments!
What’s the Story?
The year’s 2013. The world of firearms hasn’t seen a major innovation since someone glued a short-stroke piston to an AR-15. Homebuilt firearms have been the purview of country kids and garage tinkerers for decades. That said, rarely has someone made as big an impact as the men behind the Arctic Warfare.
Plastic is Fantastic
Then comes Defense Distributed.
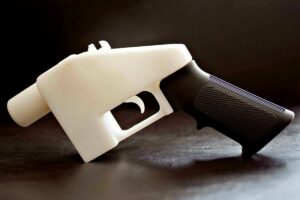
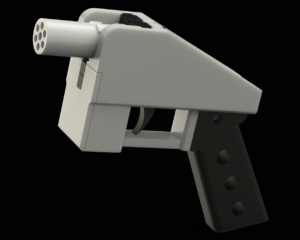
DD (not to be confused with Deterrence Dispensed, the other DD) was created by Cody Wilson, a Libertarian freethinker with an ambitious goal. That goal was simple: turn the freshly developed industry of desktop 3D printing into a way of making arms. After almost a year in development, the Liberator was born.
The idea of making a 3D printed gun was, at the time, unheard of. While today one’s options are almost limitless, when Defense Distributed made the Liberator, there were none. The core concept of the Liberator boiled down to an idea: put the power of global citizens to bear arms back in their hands.
The Liberator had a painful gestation. From its original intended printer being removed to the American government trying to censor its files, the powers-that-be didn’t want the gun in public hands. And why would they? A single shot plastic gun that could be made anywhere by anyone?
It’s an authoritarian’s worst nightmare.
The Ties That Bind
The Liberator is named after the FP45, a pistol dubbed the same, made during World War II as a weapon for partisans. The gun’s intended purpose was to be used to assassinate Nazis and take their weapons. Crude, designed as a single shot gun, the Liberator and its polymer namesake nonetheless share few design features.
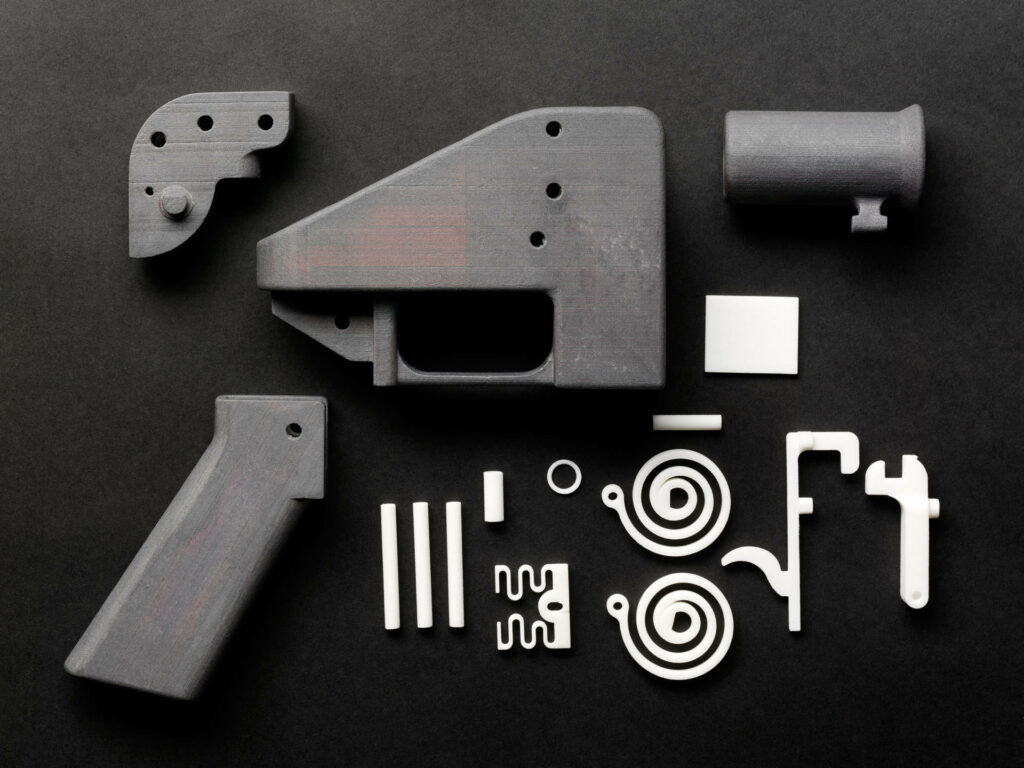
With a focus on printability by early-gen printers, and without the developed filaments of modern printing, the Liberator was as plastic as possible. Even the cocking springs were plastic. The only metal part in the original gun was a nail used as a firing pin. Even the extra thick barrel was printed plastic.
As a proof of concept, the Liberator had innumerable disadvantages that make it one of the worst homebuilt firearms by capability. It can neither use a high caliber round or shotshell nor handle repeated firing. As a single-shot, reloading takes significantly longer than for a semiautomatic. Even for what it is, it’s quite bulky.
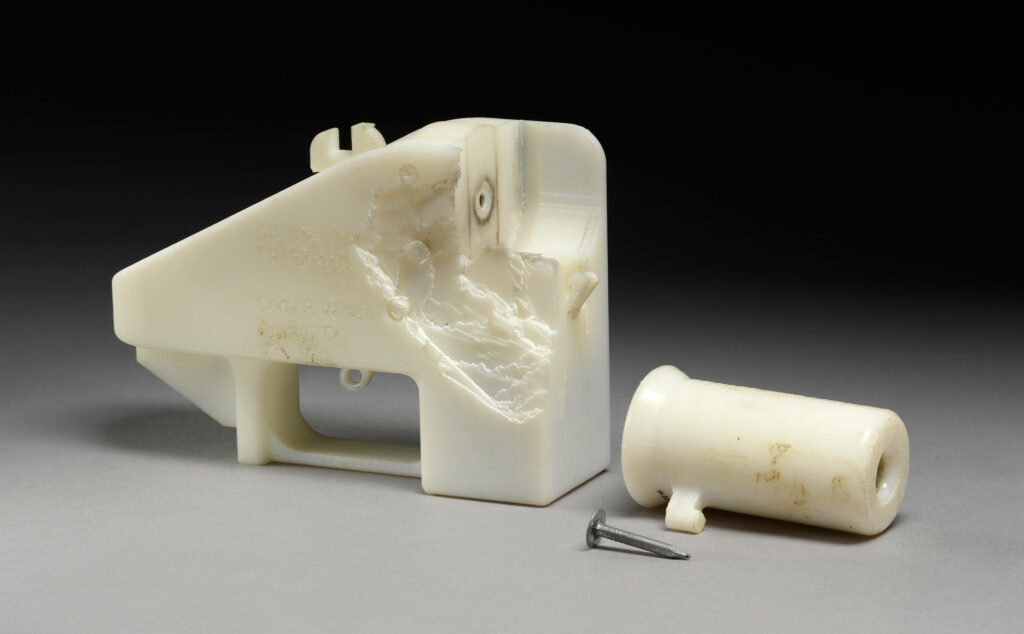
Oh, and sometimes that happens.
A Bulwark, Surprisingly
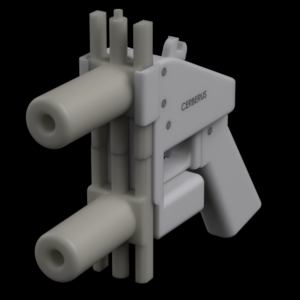
Despite its crudeness and lack of functionality, the Liberator became the core of the nascent 3D printed gun movement. Many of the earliest designs were either derivatives or takes on the Liberator design. These ranged from practical, like a rimfire variant, to ridiculous, like the “Cerberus” Liberator with multiple vertically aligned barrels.
As development went on, a community of people congregated around DEFCAD, the file repo Defense Distributed had put together, to release the Liberator and other designs. When DEFCAD was thrown into disarray by federal intervention, the community stayed together, growing into groups like FOSSCAD that revolutionized the world of homemade guns.
While the Liberator and its brethren have been mostly passed by, the impact it had globally can’t be understated. It proved a point and was the diving board for countless designers whose contributions may far outweigh its own in innovation.
But that’s a story for another time.
How do I make it?
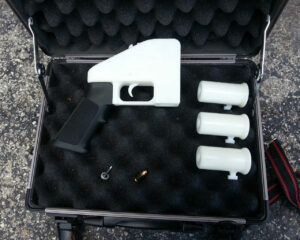
The Liberator is either extremely easy to make* or extremely hard. Depends on who you ask. From a physical perspective, it’s one of the easiest homebuilt guns a person can make, similar to the paliuntod. From a technical perspective, there are many things that can go wrong with it, up to and including self-destruction.
Filament choice is extremely important. PLA Pro or other enhanced PLA comes to mind as the go-to option today, but it wasn’t that obvious back then. 99% or 100% infill for everything is the default. Even then, you might be lucky to get a dozen shots through the gun before it breaks.
The nail is the only non-printed part in a standard Liberator, and the only metal part too. If you make a Liberator, stand far away with the gun clamped in a vice and test it behind a barrier.
File-wise, the Liberator files can be found almost anywhere. The Pirate Bay, DEFCAD, Print2a, the FOSSCAD repo… There really aren’t any limitations on where you can find them. Most copies of the Liberator include variants made by DEFCAD members in the early days of printing. These may or may not work as well as the original.
As always, tune in next week for more Homebuild History!
*Legally, of course. Laws don’t stop you from building this, but we at 3DGunBuilder encourage readers to follow all legal guidelines. If you can’t make this in your state or country, please don’t try to. Just remember that this is here for educational and research purposes only.