Has anyone ever built a homemade bullet trap for testing 80% or 3D printed guns?
Building a homemade bullet trap can be an efficient and cost-effective solution for those wanting to test their 3D printed firearms for functionality and safety without heading to the range.
When embarking on this project, it’s important to consider the materials and design elements that will provide the best results. Some common materials used in bullet traps include sand, rubber matting, and steel. Remember to always prioritize safety in your design, paying attention to aspects such as the angle of the trap and the thickness of material used to prevent over penetration.
As you build your bullet trap, keep in mind factors like the types of firearms and calibers you plan to use, as well as the frequency of use.
Let’s jump into what you need to get started building your own DIY home built bullet trap.
Building a 55-Gallon Drum Bullet Trap
When designing your own bullet trap, it’s important to consider the materials and construction that can effectively stop bullets from various calibers.
A 55-gallon drum trap is a simple and cost-effective way to create a bullet trap for your shooting range.
Here’s how to build one:
Bill of Materials
| Quantity | Material |
|---|---|
| 1 | 55-gallon Drum (including lid & latch) |
| 7 | Rubber Mulch (1.5 Cubic Feet Bags) |
| 1 | Quikrete Concrete Mix (60 to 120 lbs) |
| 4 | 2 x 4s (96″ Length) |
| 25 | Wood Screws |
| 4 | Wheel Casters |
2 x 4 Wood Cuts
| Quantity | Length | Cut |
|---|---|---|
| 2 | 24″ | Vertical Beams |
| 1 | 19.43″ | Vertical Center Strut |
| 4 | 23.43″ | Horizontal Center Struts |
| 2 | 40.89″ | Length-Wise Perimeter |
| 2 | 40.90″ | Diagonal Struts (Cut to Fit) |
Homemade Bullet Trap Build Steps
Building the Frame
- Lay out the perimeter wood cuts, and screw two of the horizontal center struts on top of each other for each end.
- Mount caster wheels to each corner, 4 in total.
- Mount the vertical center strut 2 x 4 on the same side as the caster wheels.
- Mount the two vertical beam wood cuts on the same sides on any end of the frame, aiming up from the wheels.
- Use the vertical center strut to connect both beam wood cuts together.
- Install and fit the diagnal beams.
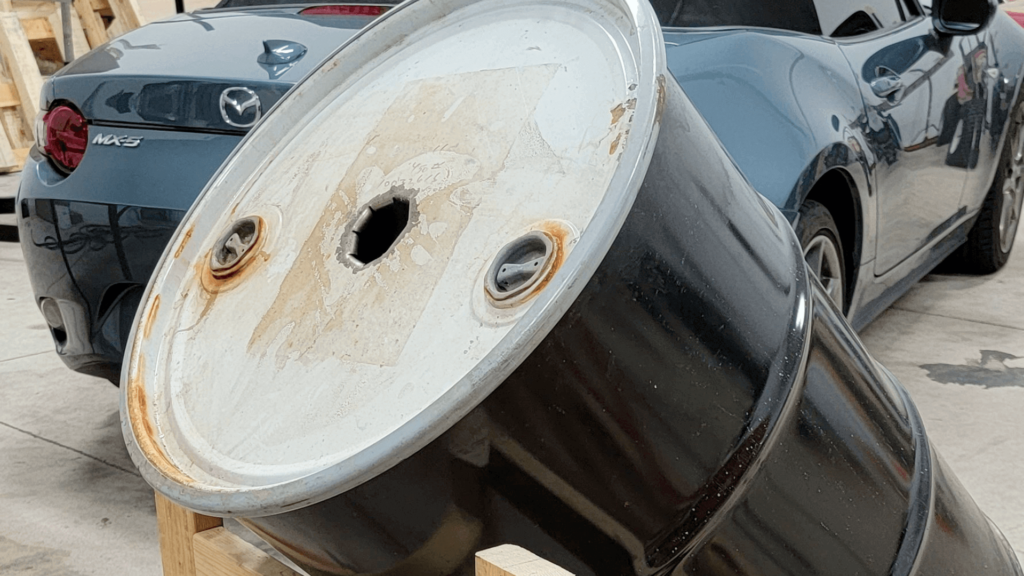
Preparing the drum
- Install the 55-gallon drum onto the frame, be sure of final install location as moving the bullet trap is not possible.
- Be sure you can remove and reinstall the barrels lid.
- Drill a 3″ hole in the center of your drums lid, use tape to cover the rough edges to prevent injury.
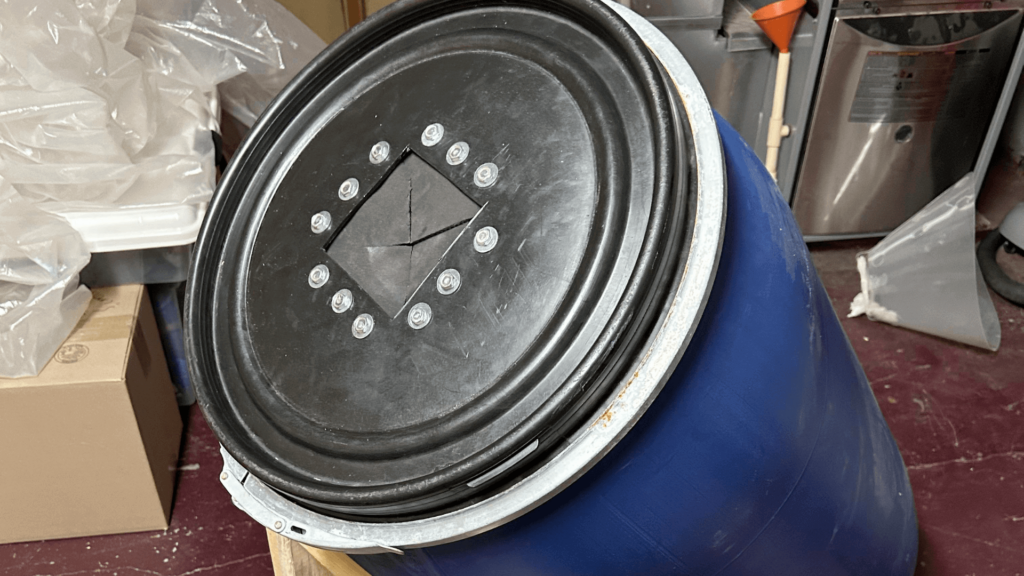
- Use the largest drill bit you have on hand to create 6 holes spaced 6 inches apart in a triangle shape around the lid of the barrel, this is for venting gas.
- Place the drum on a flat surface, follow the Quickrete instructions and pour the concrete into the drum.
Note: Let the Quikrete cure for 1 day minimum - Pour the first 2 bags of rubber pellets into the drum bullet trap.
- Mount the 55-gallon drum onton the frame.
- Add the remaining rubber pellets.
When designing and constructing your homemade bullet trap, remember to prioritize safety, utilize durable materials, and maintain a neutral, clear, and confident approach throughout the process.
Pre-Made Bullet Traps
If you are to lazy to build your own homemade bullet trap their are some affordable options available online.
Their are also commercial options but the price point is an order of magnitude higher than these options.
- Ballistic Rubber Face
- Enclosed, AR Steel Backplate
- Rated for 9 mm, 45 .357 & .44 Magnum, 5.56, 223 Caliber


Homemade Bullet Traps in Action
Here’s a really cool slow motion video of the flywheel delayed rifle test we did a few days ago. So sorry it was awhile until I was able to post it. The bullet trap isn’t mine btw lol. pic.twitter.com/ggl49TAHw3
— Evan Jones (@_Evan__Jones_) August 1, 2022
New Bullet Trap for .22, 9mm and .45 cal pic.twitter.com/TfzsBvtV0Z
— STS (@TargetRetrieval) April 16, 2022
Selecting the Right Homemade Bullet Trap Materials
When building a homemade bullet trap, it’s essential to choose the right materials to ensure safety and durability. In this section, we’ll discuss the materials needed for a successful bullet trap project: steel plates, rubber mulch, and plywood.
Steel Plates
Steel plates serve as a core component of your bullet trap, as they will be responsible for absorbing and deflecting the bullets’ impact. When selecting steel plates, ideally opt for AR500 or AR550 steel, as these types are designed to handle high-impact forces without deforming.
You can find these at your local home improvement store or online. Keep in mind, for pistol calibers, 3/8″ thickness is usually sufficient, whereas for high-power rifles, you may need to choose thicker plates, such as 1/2″ or more.
Rubber Mulch
Rubber mulch can be used as a filler material within your bullet trap, functioning to decelerate and capture bullets, and minimizing the possibility of ricochets.
This substance is composed of recycled rubber from tires and is available in bulk from home improvement stores, landscaping suppliers, or online retailers. When filling your bullet trap with rubber mulch, ensure that it’s packed densely and evenly to maintain a consistent and effective trapping surface.
Plywood
Plywood is a versatile material that can be used in various aspects of your bullet trap construction, such as reinforcing the frame, or serving as a backstop or target holder. Opt for 3/4″ or thicker plywood sheets, which can be found at any home improvement store. Keep in mind that plywood can withstand multiple shots but may eventually need replacement due to wear and tear over time. However, plywood remains an affordable and readily available option, making it easy to replace as needed.
While building a homemade bullet trap, remember to prioritize safety at all times, and follow proper guidelines in selecting, assembling, and utilizing these materials. Investing in quality materials such as steel plates, rubber mulch, and plywood will ensure a long-lasting and effective bullet trap for your shooting practice needs.
Safety Measures
When building a homemade bullet trap, it is essential to consider various safety measures to ensure a secure shooting environment. This section will discuss the necessary precautions, including ricochet prevention, ventilation systems, and projectile containment.
Ricochet Prevention
To prevent ricochets, you must design your bullet trap to capture and absorb the bullets’ energy effectively. One way to achieve this is by using a box filled with crumb rubber and covering the front with rubber belting.
This setup not only prevents ricochets, but also allows for easy maintenance, as you can replace the rubber patches when they become shot up. Make sure your box is deep enough (around 16-24 inches) to accommodate bullets and reduce the risk of a projectile bouncing back.
Ventilation Systems
Proper ventilation is crucial while using a bullet trap, as gunshots produce a significant amount of debris and gases. Good air circulation helps disperse these potentially hazardous byproducts, ensuring a healthier and safer shooting environment.
Install an adequate ventilation system with air filters and fans to maintain proper airflow and keep the area clean. Regularly inspect and clean the filters to ensure maximum efficiency.
Projectile Containment
Effective projectile containment is essential in reducing the risk of accidents. Design your bullet trap to direct the bullets into a specific area where they can lose energy and be stored safely.
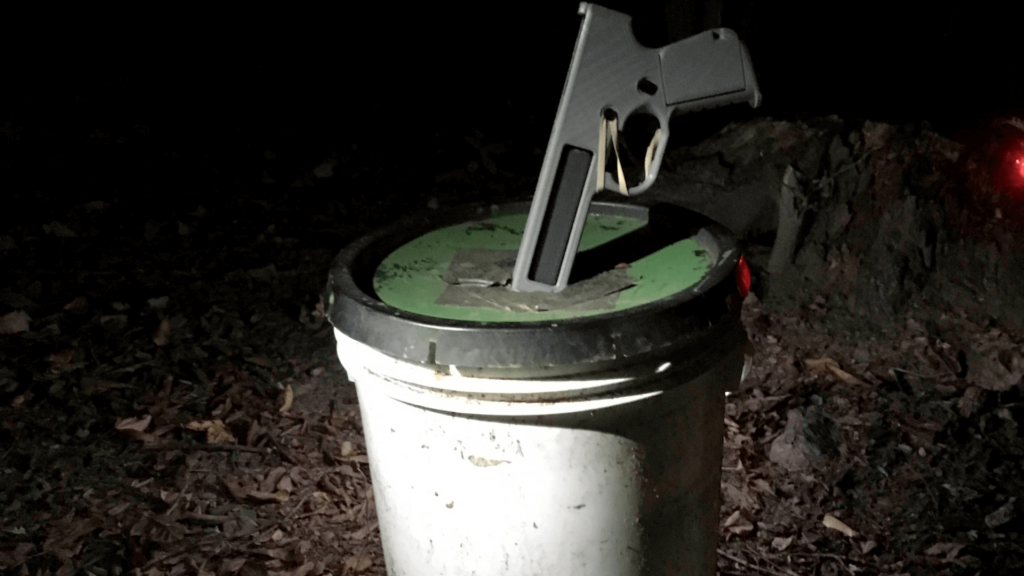
For example, you can create a bullet trap with angled side plates that guide the bullets into a round tube.
As the bullets spin in the tube and lose energy, they fall into a container, such as a coffee can, at the bottom of the tube. This setup not only prevents ricochets, but it also simplifies the process of recycling or disposing of the spent projectiles.
By incorporating these safety measures, you can ensure a secure and efficient environment for your homemade bullet trap. Always prioritize safety and follow proper guidelines when designing and using a bullet trap.
Maintenance and Environmental Concerns
Lead Dust Management
Lead dust is a considerable concern when operating a homemade bullet trap, as it poses health and environmental risks. To minimize these risks, proper management techniques are essential. Make sure to ventilate your shooting area well to ensure any airborne lead dust dissipates. If possible, use a HEPA filtered vacuum to clean up lead dust from the trap and surrounding area. This prevents the dust from spreading and minimizes inhalation risks.
Wearing personal protective equipment (PPE) such as gloves, masks, and safety glasses while handling the trap can also help reduce your exposure to lead dust. Additionally, frequent hand washing after shooting sessions and before eating or drinking is crucial for your safety.
Bullet Disposal
The convenient aspect of a homemade bullet trap is the ability to collect spent bullets, but it’s important to dispose of them responsibly. Due to lead contamination, you should follow local regulations regarding lead waste disposal. In some cases, recycling centers may accept lead-containing bullets, and some shooting ranges also offer bullet disposal services.
It’s essential to separate bullets from other materials before disposing of or recycling them, as different materials require specific handling methods. When possible, use a collection container within the bullet trap to simplify the separation process. This will make handling and disposal of spent bullets easier and safer for you and the environment.
Remember, being mindful of lead dust management and proper bullet disposal will ensure a safer homemade bullet trap experience, benefiting both your health and the environment.
Legal and Neighborly Considerations
Noise Levels and Protective Barriers
When building a homemade bullet trap, it is important to be considerate of your neighbors and any possible noise levels that may result from indoor shooting. You should take appropriate measures to reduce the noise generated by shooting activities as much as possible. Some effective methods for noise reduction include:
- Installing acoustic panels or soundproofing materials on walls and ceilings
- Creating a double-wall construction with insulation in between
- Placing soft, dense, and absorptive materials along the bullet trap’s exterior
In addition to noise control, it is crucial to ensure a protective barrier is in place to avoid stray projectiles or ricochets from reaching outside your shooting range. We recommend using a combination of steel plates and solid walls with adequate thickness, which can effectively stop bullets from penetrating through.
Frequently Asked Questions
What are the essential materials required for constructing a bullet trap?
To build a homemade bullet trap, you will need the following materials:
- AR500 steel: This high-quality steel is crucial for constructing the bullet trap’s wings and backstop as it is capable of withstanding repetitive impacts from bullets.
- A steel tube or container: This will serve as the catch for the bullets. A recommended size is a 4″ inner diameter tube with a 3/8″ wall thickness. A 55-gallon drum can also be used.
- Sand: As a filling material in the trap, sand effectively absorbs the energy of the bullet, slowing it down and eventually stopping it.
- Rubber pellets or other shock-absorbing material: This can be used to prevent the sand from spilling out or to cover the entrance of the trap.
Which design principles should be followed to effectively absorb bullet energy?
When designing your homemade bullet trap, consider the following principles:
- Angling the wings: By angling the wings of your trap at a 25° included angle, you create a safe path for deflected bullets to travel, minimizing the chances of ricochet.
- Sturdy construction: Ensure your trap is well-built and secure, with no gaps or weak points that could allow bullets to escape.
- Proper filling: Make sure your trap is adequately filled with sand or another suitable material to maximize its bullet-stopping efficiency.
How can I ensure safety while building and using a homemade bullet trap?
Follow these steps to ensure your safety while building and using your homemade bullet trap:
- Wear proper protective gear: Always wear safety glasses, gloves, and protective clothing while constructing and using the trap.
- Keep a safe distance: Stand at a reasonable distance from the bullet trap when shooting. This distance should be determined based on your specific firearm and ammo being used.
- Follow proper firearm safety protocols: Always treat your gun as if it is loaded and never point it at anything you don’t intend to shoot.
How do I maintain and check the bullet trap for longevity and security?
Maintain your homemade bullet trap by periodically checking and performing the following tasks:
- Inspect the steel wings and backstop for signs of wear or damage. If you notice any thinning or deformation, it’s time to replace or reinforce the affected areas.
- Empty and refill the sand or filler material if it becomes overly compacted or contaminated.
- Examine the rubber matting or other shock-absorbing material for wear and replace it as needed.
- Tighten or replace any bolts or fasteners that have come loose over time.
Have you built your own homemade bullet trap? Let us know an shoot us a picture of your home built 3D gun fire testing setup!